Information
Welcome to Daw Mag's music production tutorials! We're based in The United Kingdom, and are committed to providing you with everything you need to start creating music.

Fl studio tutorials: Beginner to advanced
Our tutorials cater to everyone from complete beginners to advanced producers. Daw Mag provides comprehensive music production tutorials in FL Studio, ensuring there’s something for every skill level.

12 years of fl studio experience

The FL Studio Interface-
🖥️ When you first open FL Studio, the layout can seem overwhelming. Once you understand the key areas, it becomes much easier to navigate.
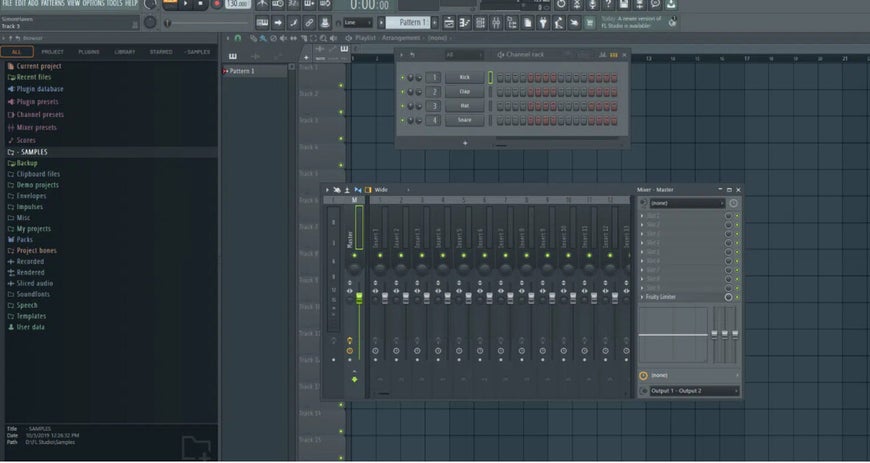

🛠️ Key Windows You Need to Know
1️⃣ Browser (Left Side Panel)
The Browser is one of the most important tools in FL Studio — it's your creative toolbox. You'll find it on the left-hand side of the screen, and it's where you can access everything you need to build a track.
Inside the Browser, you'll find folders for:
-
🎵 Samples – Drums, loops, sound effects, and more. Just drag them straight into your project.
-
🧩 Plugin presets – Saved settings for synths or effects that you can reload instantly.
-
📁 Project files – Your own saved FL Studio projects or templates.
-
🎹 MIDI files – Melodies or chord progressions you can drop right into your instruments.
-
🎤 Recorded audio – Any vocals or sounds you’ve recorded during a session.
You can customize the browser by adding your own folders too — so if you have your own drum kits or sample packs, you can make them easy to find every time you open FL Studio.
💡 Tip: You can quickly search for sounds using the search bar at the top of the browser, which saves loads of time when your library gets big.
The Browser is more than just a file explorer — it’s the launchpad for your creativity.
2️⃣ Playlist
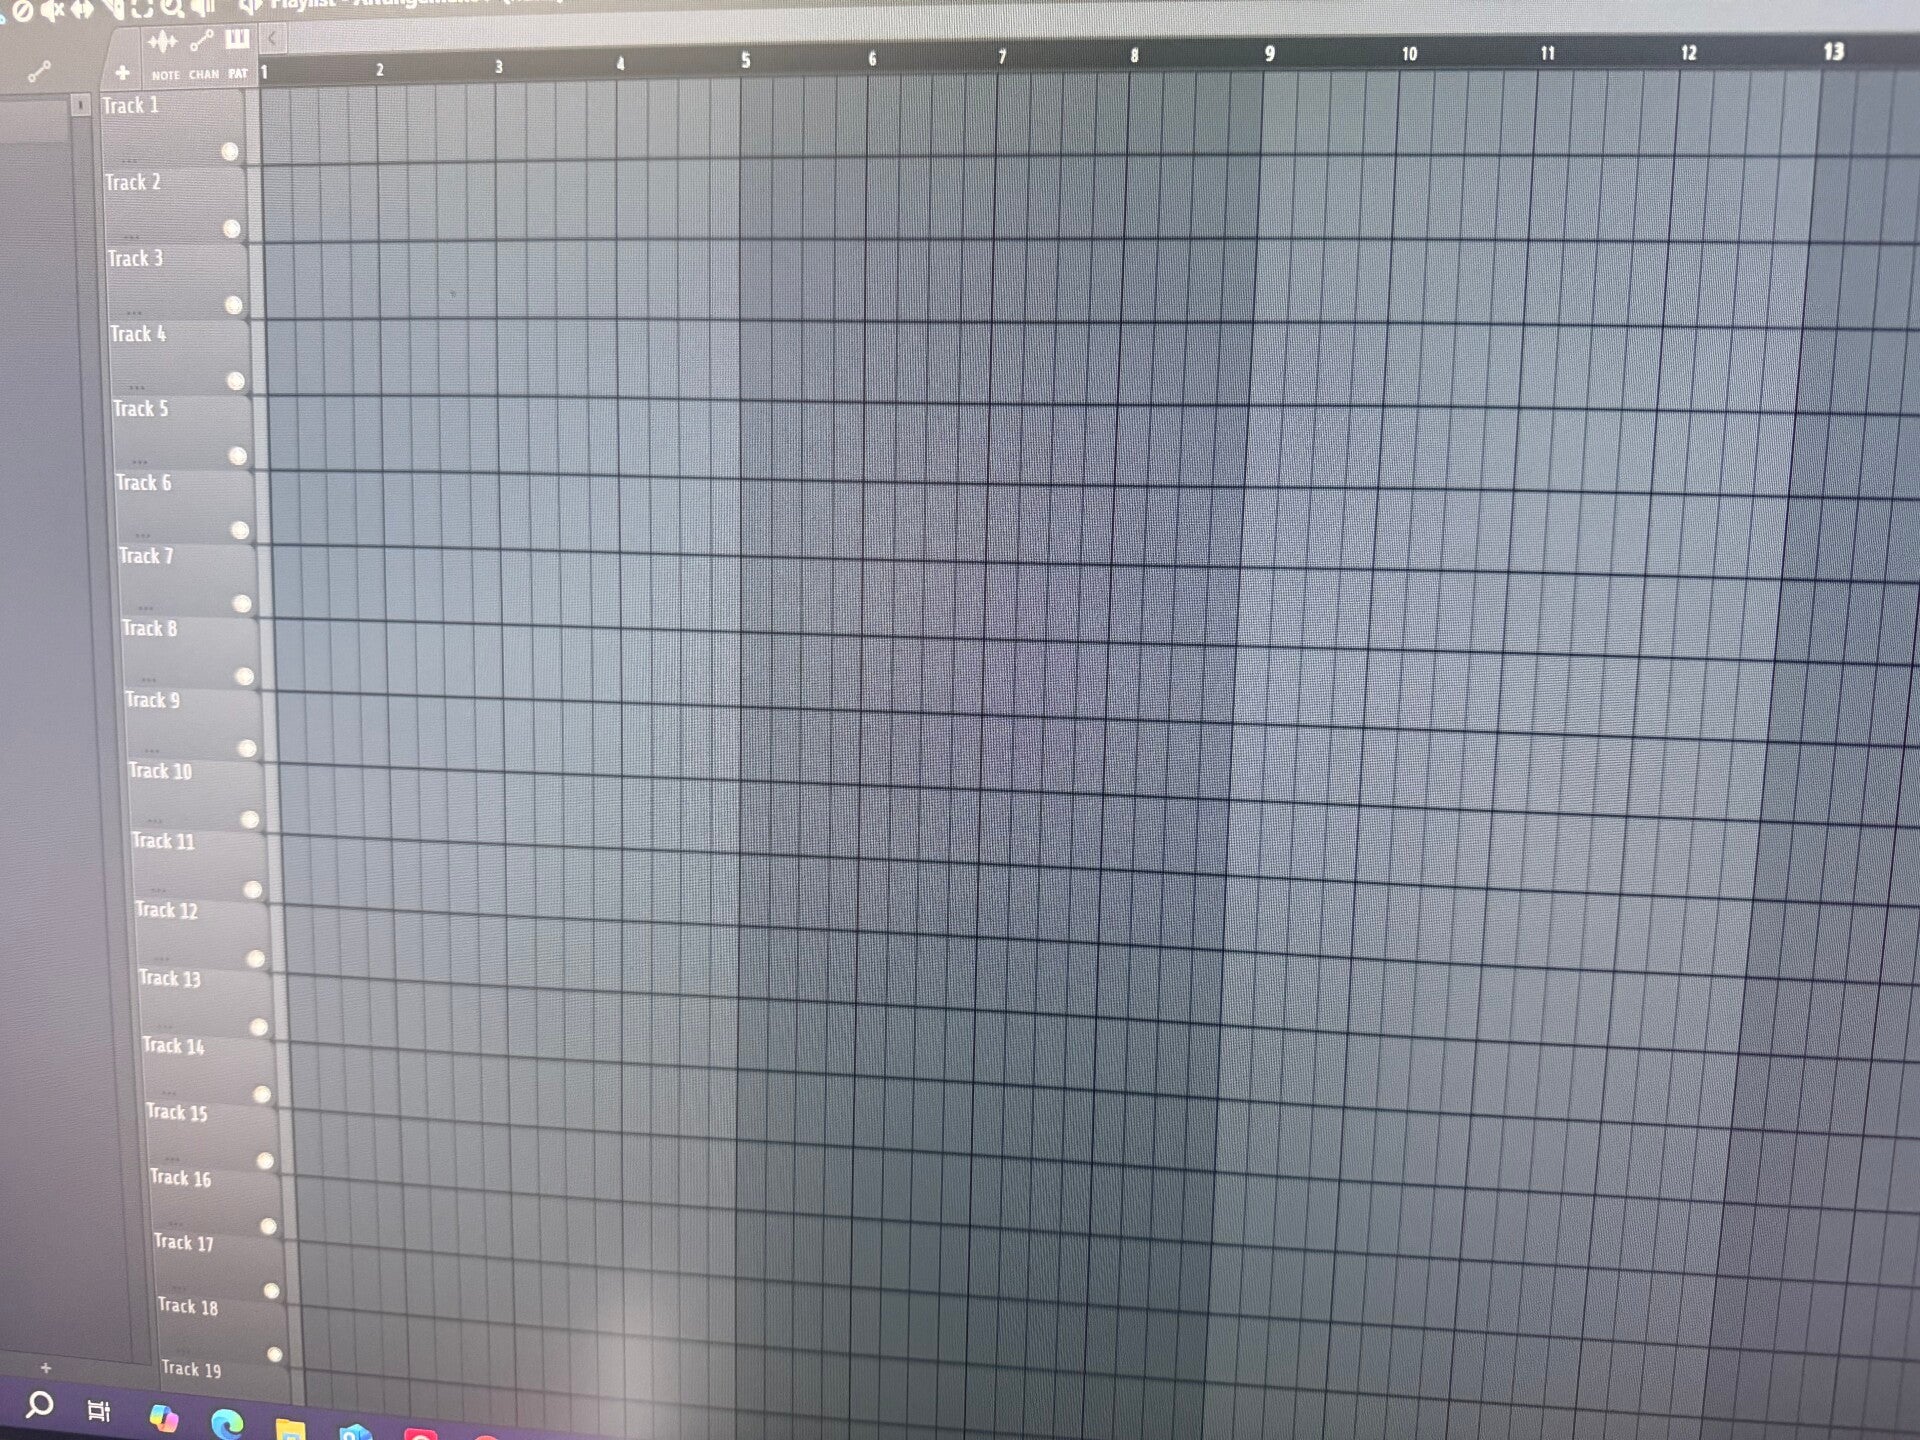
The Playlist is the heart of your track's arrangement. It’s where all the elements of your song come together — melodies, drums, vocals, automation, and more. Think of it like a canvas where you paint your music.
Here’s what you can do in the Playlist:
-
🧱 Drag in patterns – These are your beat loops, melodies, basslines, and other MIDI-based parts.
-
🎧 Add audio clips – You can drop in vocals, samples, or sound effects right onto the timeline.
-
🎚️ Use automation clips – To control volume, panning, effects, or filter sweeps over time.
-
🖌️ Rename, color, and organize tracks – Make your project easier to navigate, especially when it gets complex.
-
🔇 Mute or solo tracks – So you can focus on specific sounds while editing.
-
🖼️ Resize and move tracks freely – There’s no fixed structure or limit — create your layout how you like.
Unlike some DAWs, FL Studio’s Playlist gives you total freedom. Audio clips and MIDI patterns can go anywhere, on any track line — you’re not locked into one element per track. This means more flexibility, faster workflow, and more creative possibilities.
💡 Pro Tip: Use color-coding to visually group drums, synths, vocals, and effects — it’ll make mixing and arranging much smoother later on.

3️⃣ Channel Rack
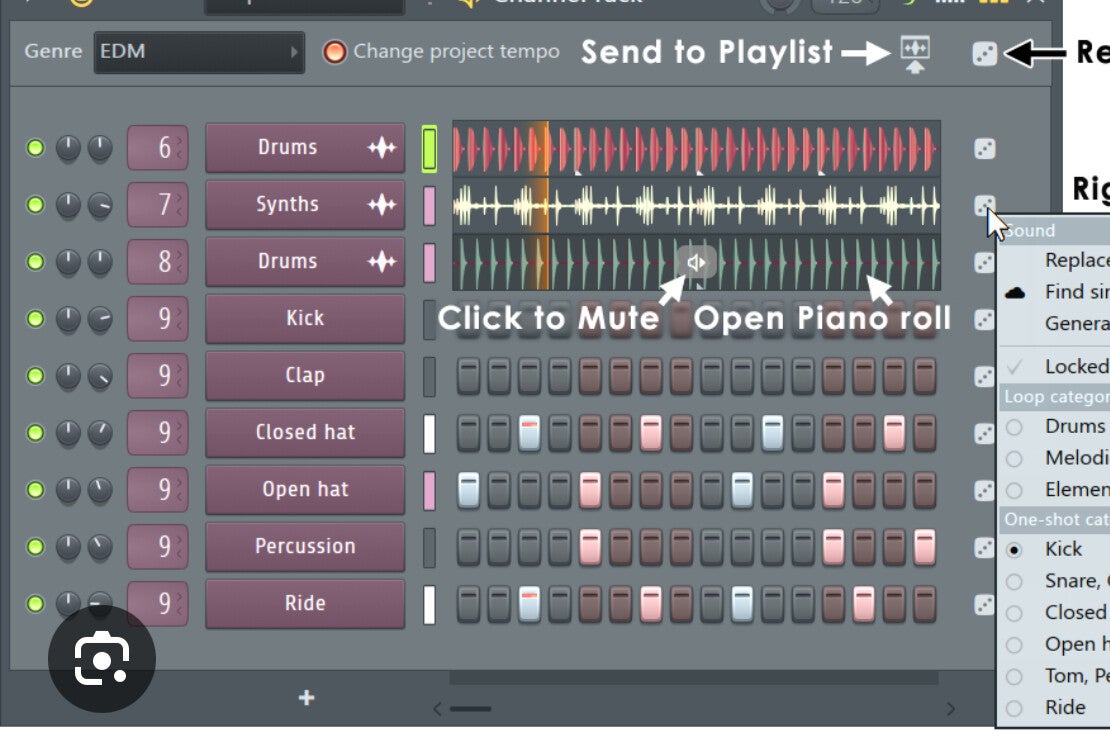
The Channel Rack is where every sound in your FL Studio project begins.
It’s your workspace for loading instruments, building beats, and controlling individual sounds before they’re arranged in the Playlist.
Here’s what you can do in the Channel Rack:
- 🎵 Load sounds and plugins – Add drum samples, instruments, or synth plugins directly into the rack.
- 🟧 Create patterns with the Step Sequencer – Click the step buttons to make quick drum loops and rhythmic patterns.
- 🎹 Switch to the Piano Roll – For melodies, chords, and detailed note editing, right-click a channel and open the Piano Roll.
- 🎚️ Control volume and panning per channel – Adjust how loud and where in the stereo field each sound sits.
- 🔀 Route to the Mixer – Assign each channel to a Mixer insert for effects, EQ, and mixing.
- 🎨 Organise your sounds – Rename, colour-code, and group channels for a cleaner workflow.
- 🗑️ Clear unused channels – Keep your project efficient and avoid unnecessary clutter.
4️⃣ Mixer
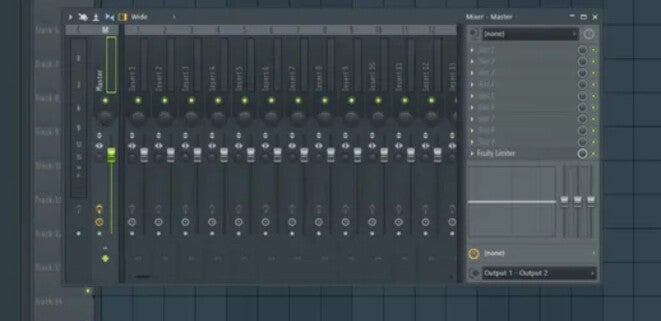
The Mixer is where you control the sound of your project.
It’s used for balancing volume, adding effects, and making your track sound polished and professional.
Here’s what you can do in the Mixer:
- 🎚️ Adjust volume levels – Balance each track so nothing is too loud or too quiet.
- 🎧 Pan sounds left or right – Position instruments in the stereo field for space and clarity.
- 🎨 Add effects – Use FX slots for reverb, delay, EQ, compression, and more.
- 🔀 Route tracks – Send multiple sounds to the same Mixer insert or to send channels for shared effects.
- 🖌 Name and colour channels – Keep your mix organised and easy to navigate.
- 📏 Monitor levels – Watch the meters to avoid clipping and distortion.
- 💾 Save mixer presets – Store your effect chains and settings for future projects.
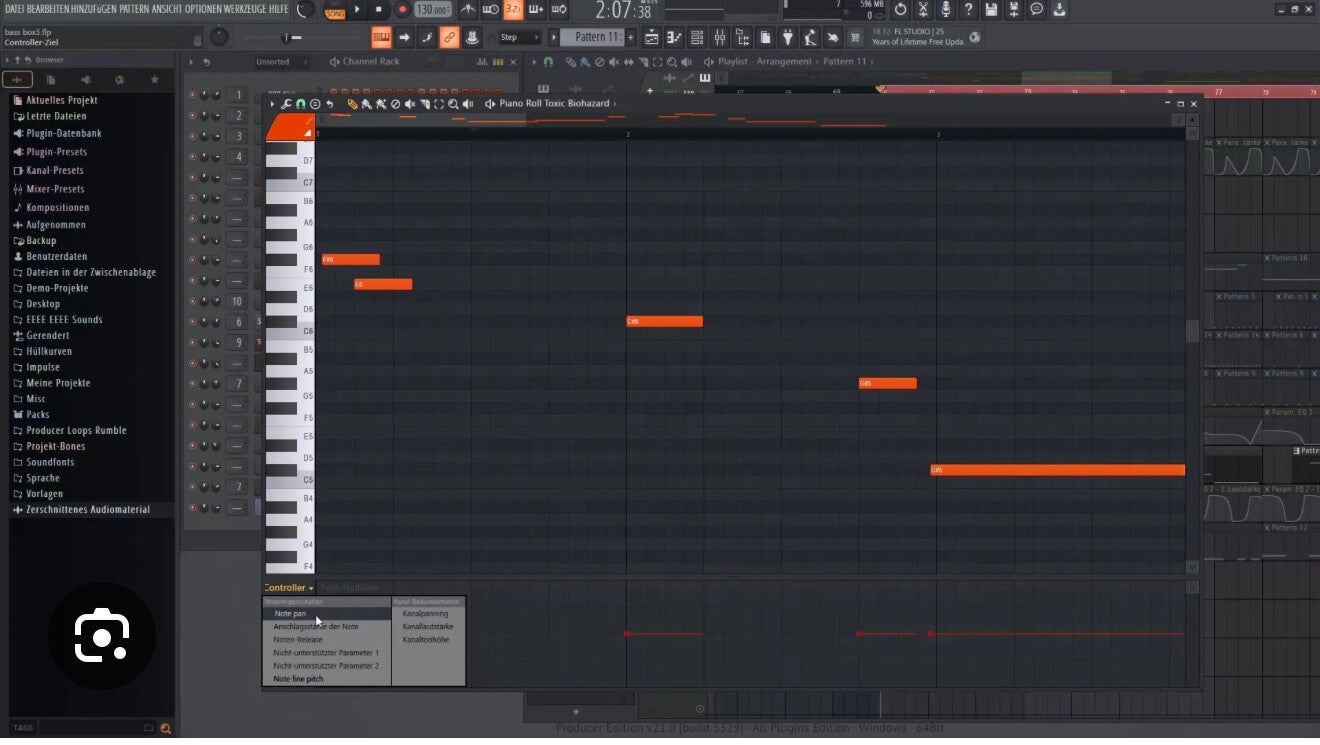
5️⃣ Piano Roll
The Piano Roll is where you create and edit melodies, chords, and complex rhythms.
It’s the main tool for working with notes in FL Studio, giving you precision and creative control.
Here’s what you can do in the Piano Roll:
- 🎹 Draw and edit notes – Click to add notes, right-click to delete, and drag to move or resize them.
- ⏱ Change note length – Adjust how long each note plays for tighter or looser grooves.
- 🔊 Control note velocity – Make notes softer or louder using the velocity lane at the bottom.
- 🎼 Create chords – Stack multiple notes vertically to build rich harmonies.
- 🎯 Snap to grid – Keep notes aligned with your project’s timing or turn it off for freer placement.
- 🖌 Use tools for creativity – Quantize, strum, arpeggiate, or randomise notes with built-in tools.
- 🔀 Switch instruments quickly – Change the selected channel to edit another instrument’s notes without leaving the Piano Roll.

Making your first beat in FL Studio-
🥁 Making Your First Beat in FL Studio
Now that you’ve got a feel for FL Studio’s layout, it’s time to create your first beat. This guide will walk you through making a simple drum loop — the foundation of most modern music genres like hip hop, trap, pop, and EDM.
No music theory needed — just follow along.
🔧 Step 1: Set the Tempo
At the top of the FL Studio window, you’ll see the tempo/BPM (beats per minute) setting.
- For hip hop/trap: Set it between 70–90 BPM
- For house/EDM: Try around 120–130 BPM
Just click and drag the number or right-click it and type in your desired tempo.
🥁 Step 2: Add a Kick Drum
- Open the Browser (left panel) → go to Packs → Drums → Kicks
- Drag a kick sample into the Channel Rack
- Click the first and third steps in the sequence (for a basic 4-step loop)
🎧 Hit Play — you’ve got a basic rhythm!
✨ Step 3: Add a Snare or Clap
- In the Browser, go to Claps or Snares
- Drag your chosen sound into the Channel Rack
- Place it on step 5 and step 13 (these fall on the 2nd and 4th beat — classic backbeat)
🧢 Step 4: Add Hi-Hats
- Go to Hats → Closed Hats in the Browser
- Drag a hat sample into the Channel Rack
- Click every 2nd step (or every step for faster rhythm)
Want a bounce? Try skipping a few and experimenting with rhythm — you can always open the Piano Roll to fine-tune it.
🎼 Step 5: Organize in the Playlist
- Click Pattern 1 and drag it into the Playlist
- Use the Draw tool to place it in a row (one loop = one bar)
- Duplicate it by selecting and dragging while holding Shift
Now you’ve started arranging your beat!
🎛 Step 6: Route to the Mixer
- Click each sound in the Channel Rack
- In the top-right corner of its window, assign it to a Mixer Track (1, 2, 3, etc.)
- Open the Mixer (F9) and adjust levels, pan, or add effects like reverb and EQ
This helps balance your beat and adds polish.
🔥 Bonus: Add Some Bounce
- Add 808s or sub bass from Packs → Bass or 808 folders
- Open the Piano Roll of the 808 and follow your kick pattern
- Want groove? Add a swing amount using the knob in the Channel Rack!
✅ You’ve Made Your First Beat!
You now have:
- A basic drum pattern
- A structure in the Playlist
- Sounds routed to the Mixer
- An understanding of how beats are built from scratch
Ready to level up?
👉 Next Tutorial: Creating Melodies in FL Studio


Creating Melodies.
🎹 Creating Melodies in FL Studio
Now that you’ve built your first beat, it’s time to learn how to create melodies that give your track emotion, energy, and identity.
Whether you’re going for chill vibes, dark trap, or upbeat dance — this guide will show you how to start crafting melodies even if you don’t know music theory.
🛠️ Step 1: Choose an Instrument
FL Studio comes with built-in plugins you can use to create melodies. Some great options to start with:
- FL Keys (basic piano)
- Sytrus (synth sounds)
- Flex (great modern presets)
- GMS (synth-heavy beats)
👉 Go to Add → Channel → (select plugin)
Example: Add → Channel → Flex
Browse through presets and find a sound you like.
🎼 Step 2: Open the Piano Roll
Once your instrument is loaded:
- In the Channel Rack, click the instrument name
- Right-click it → Piano Roll
This is where you’ll draw your melody notes.
🎹 Step 3: Start with a Simple Pattern
Here’s a beginner-friendly trick:
- Set your scale to C minor or A minor — no black keys = no wrong notes
- Draw 4 notes across different octaves (e.g., C → E → G → A)
- Keep spacing between notes even to stay in rhythm
- Preview by pressing Play
🎯 Pro Tip: Use ghost notes (Helpers → Ghost Channels) to see other patterns while writing melodies.
🎚 Step 4: Layer the Melody
Add variety by:
- Changing the octave (Ctrl + Up/Down Arrow)
- Doubling notes to create chords
- Adding a counter melody using a second instrument (like a pad or bell)
Example:
- Main melody with piano
- Counter melody with strings or synths
🎛 Step 5: Add Effects
Open the Mixer (F9) and:
- Route your melody to a free mixer track
- Add effects like:
- Reverb (for depth)
- Delay (for bounce)
- EQ (to clean muddy frequencies)
- Chorus or Gross Beat (for creative fx)
This makes your melody feel alive and polished.
💡 Melody Tips for Beginners
- Stick to 4–8 note loops to keep things simple
- Try humming a tune, then recreate it in the Piano Roll
- Don’t overthink — simplicity often sounds the best
- Use the Slice tool to chop and rearrange melodies creatively
✅ You’ve Created Your First Melody!
At this point, you’ve:
- Picked an instrument
- Created a melody in the Piano Roll
- Layered sounds and added effects
- Given your beat a real vibe
👉 Next Tutorial: Structuring a Full Track in FL Studio

Structure In FL Studio-
You’ve made a beat and created a melody — now it’s time to turn those loops into a full track. Song structure gives your music flow and emotion. This tutorial shows how to go from a simple loop to a track with an intro, verses, chorus, and more.
Whether you’re making a 2-minute chill track or a 4-minute banger, this guide breaks it down.
🎯 Step 1: Understand Basic Song Structure
Here’s a common structure you can follow:
Intro → Verse → Chorus → Verse → Chorus → Bridge → Final Chorus → Outro
Each section usually lasts 4, 8, or 16 bars.
🧰 Step 2: Split Your Patterns
If you’ve made one long pattern with drums, melody, and everything inside it — don’t worry. Let’s break them up:
- In the Channel Rack, name your patterns clearly:
- Pattern 1 = Drums
- Pattern 2 = Melody
- Pattern 3 = Bass
- Pattern 4 = FX
- Right-click a pattern → Split by Channel (this creates separate patterns for each sound)
🗂 Step 3: Arrange in the Playlist
Head to the Playlist (F5) and drag your patterns into rows.
A basic example layout:
[Bars 1–8] Intro: Melody only, no drums
[Bars 9–24] Verse: Add kick, snare, hi-hats
[Bars 25–40] Chorus: Full beat with bass and melody
[Bars 41–56] Verse 2: Slight variation or drop elements
[Bars 57–72] Chorus 2: Bring back full energy
[Bars 73–end] Outro: Fade melody, remove drums gradually
🎛 Step 4: Add Transitions & FX
Use risers, impacts, and reverse sounds to smooth out transitions between sections.
You can find these in:
Packs → FX → Risers / Impacts / Sweeps
Drag them into the Playlist where sections change (e.g., before the chorus or outro).
🔄 Step 5: Use Automation for Variety
Automation adds movement to your track.
Try automating:
- Volume (fade in/out)
- Filter cutoff (low-pass for build-ups)
- Reverb (make things feel distant or close)
To do this:
- Right-click any knob → Create Automation Clip
- It appears in the Playlist — adjust the curve to control it over time
🎚 Step 6: Final Touches
Before exporting:
- Adjust volume levels in the Mixer
- Use EQ to clean overlapping frequencies
- Add limiter on the Master for better loudness
- Listen on headphones + speakers to catch balance issues
✅ You’ve Structured a Full Track!
By now, you should have:
- A clear intro, build-up, and drop
- Transitions and automation for flow
- A full song you can bounce out and share
👉 Next Tutorial: Exporting and Uploading Your Track
Coming Tomorrow ❤️🎶 New ones are uploaded daily so make sure you come back to visit us!

🎵 Tutorial: Exporting and Uploading a Track in FL Studio
🔧 Step 1: Final Check Before Exporting
Before exporting your track:
-
Save your project. (File > Save or Ctrl+S)
-
Make sure:
-
All your patterns are arranged properly in the Playlist.
-
Levels are balanced in the Mixer.
-
No clipping in the master channel (watch that red peak light!).
-
📤 Step 2: Export Your Track
-
Go to File > Export
-
Choose your format: WAV (best quality), MP3 (smaller size), or both.
-
Most platforms accept MP3 (320 kbps) or WAV (16-bit or 24-bit).
-
-
Name your file and choose a location.
-
Keep filenames simple and clean.
-
-
Export Settings:
-
Mode: Full song
-
Tail: Leave remainder (prevents chopping off reverb/delay)
-
WAV:
-
Bit depth: 16-bit (standard) or 24-bit (higher quality)
-
-
MP3:
-
Bitrate: 320 kbps (for highest MP3 quality)
-
-
-
Click Start!
-
FL Studio will render your track and save it.
-
🌐 Step 3: Uploading Your Track
Here’s how to upload to popular platforms:
✅ SoundCloud:
-
Go to soundcloud.com
-
Log in > Click Upload (top right)
-
Drag and drop your file or browse for it.
-
Add:
-
Title
-
Description
-
Tags
-
Choose Public or Private
-
-
Hit Save or Publish
✅ YouTube (with a visualizer or cover image):
-
Use a tool like FL Studio ZGameEditor Visualizer or third-party software (e.g., Shotcut or Canva for adding a static image to the track).
-
Export the video.
-
Go to youtube.com > Click Upload
-
Fill in the info > Select your video file > Publish
✅ Spotify (via a distributor):
Spotify doesn’t let you upload directly.
Use a distributor like:
-
DistroKid
-
TuneCore
-
LANDR
They’ll handle uploading to Spotify, Apple Music, etc.
🎯 Pro Tips
-
Always listen back to your export before uploading.
-
Normalize audio if needed (FL Studio can do this during export).
-
For beat sales: tag your MP3s and add contact info in metadata.
✅ Summary
-
Export: File > Export > WAV/MP3
-
Choose the right settings
-
Upload: Based on your platform of choice

🎛️ Tutorial: Automating Effects in FL Studio (Make Your Mix Come Alive)
🎛️ Tutorial: Automating Effects in FL Studio (Make Your Mix Come Alive)
Automation is what gives your tracks movement and emotion. Whether it’s fading in reverb, making a filter sweep, or controlling volume over time—automation brings your music to life.
🔄 Step 1: What Is Automation?
Automation is FL Studio’s way of recording and drawing changes to a parameter (volume, filter, pitch, etc.) over time. You can automate almost anything.
Examples:
- Fade-in volume
- Low-pass filter sweep
- Delay build-ups before a drop
✍️ Step 2: Create an Automation Clip
Let’s say you want to fade out a synth at the end of your drop:
- Right-click the Volume knob of the synth in the Mixer or Channel Rack
- Select “Create automation clip”
- An envelope appears in the Playlist
- Use the pencil tool to create points and draw your fade-out
You can add control points by right-clicking and curve them by dragging the middle of a line.
🎚️ Step 3: Automate a Filter Sweep
For a classic EDM-style build-up:
- Add Fruity Filter to your synth
- Turn down the Cutoff Frequency
- Right-click the Cutoff knob > Create automation clip
- In the Playlist, draw a rising curve leading into the drop
You’ve now automated a filter sweep!
🧠 Pro Tips for Automation
- Right-click > “Make unique” if you want a separate automation for a duplicated sound
- Use LFO shapes (right-click > “Init song with this position”) for tremolo or wobble effects
- Rename and color-code your automation clips to stay organized
✅ Summary
- Automation lets you control any knob or slider over time
- Use it to add movement and energy to your music
- Practice automating volume, filters, reverb, and panning

💥 Tutorial: Sidechain Compression in FL Studio (Make Your Kick Punch)
Ever wonder how pro tracks get that pulsing effect where the kick punches through the mix? That’s sidechaining.
In this tutorial, we’ll cover:
- What sidechaining is
- The fast way to do it in FL Studio
- Bonus: a manual method using Fruity Peak Controller
🎧 Step 1: What Is Sidechaining?
Sidechaining is when one sound (like a kick) triggers volume reduction in another (like a bass or pad). It clears room in the mix and creates that classic “pumping” sound in dance music.
⚡ Step 2: Fast Sidechaining With Fruity Limiter
- Route your Kick and Bass to their own Mixer tracks
- Select your Bass mixer track
- Right-click your Kick mixer insert > Sidechain to this track
- Add Fruity Limiter to the Bass mixer track
- In Fruity Limiter:
- Go to Comp tab
- Set Sidechain to 1
- Threshold: around -30 dB
- Ratio: 4:1 or higher
- Adjust Attack and Release to taste
💡 You’ll see the bass ducking every time the kick hits—cleaner low end instantly.
🔧 Step 3: Manual Sidechaining (With Fruity Peak Controller)
Want more control or to sidechain pads, synths, vocals?
- Add Fruity Peak Controller to the Kick
- Go to the volume knob of the sound you want to duck (e.g., pad or bass)
- Right-click > Link to Controller
- Choose Peak Control > Peak
- Invert and tweak the base level for a smooth dip
🎯 More advanced but lets you fine-tune every shape and depth of ducking.
✅ Summary
- Use sidechain to clean up your low-end and give the kick room
- Fruity Limiter = fast, clean results
- Peak Controller = ultimate control
- Works great on bass, pads, reverb tails, vocals, and more

🎚️ Tutorial: Mastering Your Track in FL Studio (With Stock Plugins)
Once your track is mixed and exported, the final touch is mastering—making it sound loud, polished, and ready for release.
Mastering boosts overall volume, balances the frequency spectrum, and glues everything together.
Let’s master using only stock FL Studio plugins.
🛠 Step 1: Import Your Finished Track
- Open a new FL Studio project
- Drag your exported WAV or 24-bit MP3 into the Playlist
- Route it to Insert 1 in the Mixer
🔊 Step 2: Basic Mastering Chain
Here’s a simple starting chain using stock plugins:
1. Fruity Parametric EQ 2
- Cut any harsh highs above 18kHz
- Gently boost lows (~60Hz) and highs (~10kHz) if needed
- Keep changes subtle (1–2dB max)
2. Fruity Multiband Compressor
- Load the preset “Mastering 2.4”
- Tweak each band if needed (low, mid, high compression)
- Goal: more balance and glue
3. Fruity Limiter (Limiter mode)
- Set Ceiling to -0.1dB
- Pull down the Threshold to increase perceived loudness
- Watch the Gain Reduction meter: don’t overdo it
4. (Optional) Maximus
- Use the “Default” preset or “Clear Master RMS”
- Slight compression on low/mid/high bands
- Keep the Master level controlled
🎧 Step 3: Final Checks
- A/B compare with a reference track in the same genre
- Listen on headphones, monitors, and phone speakers
- Leave about -14 LUFS for streaming (Spotify, YouTube)
✅ Use Youlean Loudness Meter (free plugin) to measure your LUFS if needed.
✅ Summary
- Mastering makes your track loud and polished
- Use: EQ > Compression > Limiting
- Keep it clean and avoid distortion
- Compare with pro tracks to guide your ears

🎤 Tutorial: Vocal Processing in FL Studio (Make Vocals Sound Studio-Ready)
Getting clean, powerful vocals is key to making your tracks sound professional. Here’s how to process vocals using only FL Studio stock plugins.
Step 1: Clean Up the Recording
• Trim silence and background noise using the slice tool or Edison.
• Add Parametric EQ 2 and cut anything below 80Hz (low-end rumble).
• Reduce harshness around 2kHz–5kHz gently.
Step 2: Compression (Control Volume)
• Add Fruity Compressor or Fruity Limiter (Comp mode).
• Try these settings:
– Ratio: 3:1 to 4:1
– Threshold: around -20dB
– Attack: 10ms
– Release: 100ms
• Adjust until the vocal stays balanced and present.
Step 3: Add Reverb and Delay
• Use Fruity Reeverb 2 (Room Size: small/medium, Decay: 2.5s, Wet: ~20%).
• Add Fruity Delay 2 for depth (sync to tempo, subtle mix).
• Tip: Route delay/reverb to a separate mixer send for better control.
Optional Enhancements
• Use NewTone or Pitcher for pitch correction.
• Stereo Shaper can widen backing vocals.
• Fruity Blood Overdrive adds warmth—go easy with it.
Summary
• EQ removes mud and harshness
• Compression balances the dynamics
• Reverb/delay add space and depth
• Enhance with pitch correction and stereo tricks

🧱 Tutorial: Arranging a Full Track in FL Studio (From Loop to Full Song)
Got an 8-bar loop? Here’s how to turn it into a full track structure that flows like a professional release.
Step 1: Understand the Basic Song Structure
Most electronic tracks follow a structure like this:
• Intro (0:00 – 0:30)
• Build-up (0:30 – 1:00)
• Drop / Chorus (1:00 – 1:30)
• Break / Verse (1:30 – 2:00)
• Build-up 2 (2:00 – 2:30)
• Drop 2 (2:30 – 3:00)
• Outro (3:00 – End)
Use this as a template, then tweak it to your style.
Step 2: Copy and Vary Your Loops
• Copy your 8-bar loop across the Playlist.
• Remove drums for the intro.
• Mute melodies for breakdowns.
• Bring elements in and out to keep things interesting.
Variation is key — never let the exact same thing repeat for too long.
Step 3: Add Transitions and Energy
• Use risers, snare rolls, crashes, and filter sweeps.
• Automate EQ and volume for smooth transitions.
• Add impacts or sub drops for energy changes.
Tip: Use automation clips (right-click most knobs > “Create automation clip”).
Step 4: Keep the Listener Engaged
• Try muting the kick for 1 beat right before a drop.
• Add short fills using snares or FX.
• Layer subtle textures in the background (pads, noise, ambience).
Summary
• Build around an intro > build > drop > break > drop > outro
• Use automation and FX for smooth transitions
• Keep elements evolving to avoid repetition